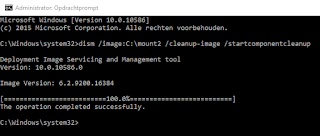
When creating Windows images with lot's of updates, it's possible to shrink them before or after capturing the image. When deploying systems with less free disk space (like thin clients) this may be needed to fit. The DISM tool contains multiple servicing commands related to the component store (or the WINSXS directory). This location is used during servicing operations within Windows installations. Servicing operations include, but are not limited to, Windows Update, service pack, and hotfix installations.
The component store contains all the files that are required for a Windows installation. And, any updates to those files are also held within the component store as the updates are installed. This causes the component store to grow over time as more updates, features, or roles are added to the installation. The component store uses NTFS hard links between itself and other Windows directories to increase the robustness of the Windows platform.
The following commands can be used to shrink Windows installations and/or WIM images:
When creating a reference image use the online command:
Dism.exe /online /Cleanup-Image /StartComponentCleanup
Dism.exe /online /Cleanup-Image /StartComponentCleanup /ResetBase
Dism.exe /online /Cleanup-Image /SPSuperseded
When the image is already created, mount it and use the offline command:
Dism /image:<path> /Cleanup-Image /StartComponentCleanup
You can also run the following command to check the status of the Component Store:
Dims.exe /Online /Cleanup-Image /AnalyzeComponentStore
This can save multiple gigabytes on the image size!
For more information:
Clean Up the WinSxS Folder
How to address disk space issues that are caused by a large Windows component store (WinSxS) directory
How to Clean up the WinSxS Directory and Free Up Disk Space on Windows Server 2008 R2 with New Update


Those dism commands only work in Windows 8/8.1 and upward.
ReplyDeleteThanks for mentioning!
Delete