Remote Control functionality is much better in ConfigMgr 2012. In ConfigMgr 2007 it was already a widely used feature, but it will be more used now! This because Remote Control functionality has more options available, which are very good.
The first one is named "Send Ctrl+Alt+Del key". In ConfigMgr 2007 it was not possible to remote Control a device, which was not logged-on. Then the Remote Desktop Protocol (RDP) was used to logged-on a device. It was also not possible to logout and logon with another user (for example: Administrator account). This functionality is available in ConfigMgr 2012 now!
The second one is named "Enable Clipboard Sharing", which becomes very handy when copy and paste actions must be done. Most of times this functionality is needed during troubleshooting a device.
The third one is named "Lock remote Keyboard and Mouse". When Remote Control a device now, there can be set a lock on the remote device. Then a user logged-on the device, cannot use his/her own keyboard and mouse during the remote session anymore.
Don't forget to configure the "Default Client Agent Settings", which is needed to have it all functional. Most settings are configured by default here. Only Permitted viewers must configured to users which receive the "Remote Control" rights. Other settings can be configured in this screen as well.
All functionality named here is very useful. So I will repeat my line from start: Remote Control functionality is much better in ConfigMgr 2012.
In ConfigMgr 2007 it was already possible to configure Maintenance Windows on collections. With Maintenance Windows a Service Window can be set, for installation and/or rebooting functionality. In ConfigMgr 2012 this functionality is still available, which is very handy for Patch Management on production systems. That way you are sure about installation and/or rebooting times, which are usually not during working hours.
Maintenance Windows can be set at the following ways:
- In ConfigMgr 2007: Rightclick on the collection, and choose: "Modify Collection Settings" > Maintenance Windows tab
- In ConfigMgr 2012: Rightclick on the collection, and choose: "Properties" > Maintenance Windows tab
Choose to create a new schedule here, and set properties for the right Service Window. I my case this will be every saturday between 13:00 and 17:00
When configuring Patch Management jobs in ConfigMgr 2012, properties can be set for Maintenance Windows. In the "Automatic Deployment Rule", used for Patch Management, there can be options set to "perform activities outside any defined maintenance windows". Normally this will not be the case.
There can also be options set to suppress reboots on servers and workstations. That way Software Updates will be installed within the Maintenance Window, while rebooting the system will not be done. Then this will be an manually action.
Now have a look at the server where Software Updates are advertised. When Scan Cycle has been run, and updates are needed for the system, an icon will be available in the System tray.
When rightclick on the icon, two options will be available. "Open Software Center" and "View Required Software". Both will have different functionality. When starting "Open Software Center" the following is possible:
There are Software Updates available, but not installed yet. This because of the Maintenance Window! Status here says: "Past due - will be installed". You can also have a look at Options here. There will be settings available for Remote Control and Power Management also.
When choose Schedule here, it is still possible to overrule the Maintenance Window, and install software directly. This is a manually action which can be done per system, which is most of times not recommended. Just leave it.
When starting "View Required Software" it is possible to change software installation settings also. They will be also available in Software Center > Options screen. Again there is a possibility here to install them directly, or "outside the configured business hours".
Best thing is leave these settings alone, and trust on the already configured Maintenance Window. That way you can make sure that installation and/or rebooting is only done within the Service Window!
In this blog I will explain how to update the Windows Image with "Offline Image Servicing" functionality.
In ConfigMgr 2007 it was always a hard job, for keeping you images up-to-date. This because Patch Management in ConfigMgr must already be working, when creating and updating a new Windows image. I've see lot's of times, when creating new images, that Software Updates are not working in the Task Sequence. Then the whole proces must be started again (which is very time-consuming).
Also when updating the existing image, say after 6 months, new updates must be advertised to the collection where the device is placed. This whole proces is again time-consuming, because every month new updates are available. This will make the total deployment time longer, because some customers want all updates in there OSD Task Sequence, before the device is used by people.
In ConfigMgr 2012 things are completely different. Now it's not needed to update a new or existing Windows image in the Task Sequence anymore. Updates can inject immediately in the Windows image now, which is a great advantage! This is called "Offline Servicing" which is a new feature in ConfigMgr 2012. Of cource it's still needed to configure Patch Management in ConfigMgr 2012 to have this functionality available.
First create or import a WIM-based Windows image. Put this one on a distribution point, and (to make sure) make a back-up of it. Now select the Windows image, and select "Schedule Updates" to start the wizard.
The updates are shown now, that can be installed in the image. You have the choice here to select only x86 or x64 updates, or choose ALL updates. There is also the possibility to select all updates, or select them manually. In this case (I used a Windows 7 install image, without Servicepack 1) there are 96 updates available, out of 190 updates total.
I choose to install all 96 updates here, and I'm wonder how long it takes to inject that updates. Also I want to know how big the image will be after injecting these updates. Choose Next to go further.
There is an option available to immediately inject updates here, or start it at a later time (for example: during evening times or weekend days). Choose Next again to make it happen.
After a confirmation, the wizard will be completed. This is all happening within one minute, but the whole proces must still starting. For having this information open the "OfflineServicingMgr.log" file, which can be found in the ConfigMgr\Logs folder. Now there will be exactly displayed what's going on here.
At the end of injecting updates, there's even a new WIM image created. The old one will be renamed as BAK-image file. So making a back-up yourself is not needed this way! All this proces is very easy to use, and can be done during evening times or weekend days.
What a great new feature in ConfigMgr 2012 this is. It's not needed now to build and use a Task Sequence for Software Updates anymore! More (new) features will be explained in next blogs.
Now Patch Management is configured right, Software Updates will be deployed to all devices with the ConfigMgr client installed. You may want to see what's the difference in this new release. I have some screenshots created for you then.
When updates are available for the device, an icon will be displayed in the System tray. This will blink when a reboot is required. When rightclick on this icon, different options will be available.
When updates are available but not installed yet, there is the choice for install immediately or outside configured business hours. There is also the option here to change software installation settings, and restart the computer.
In Software Center this will looks like this. There is the option here to install and/or reboot the computer.
During installation the progress bars for all updates are shown. This will have an randomly order during installation.
After installing, the restart will be pending. This depends on configuration and "Maintenance Windows" of course.
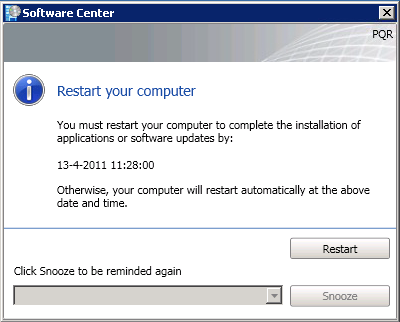
There is also another "Restart your computer" window that looks like this. When Software Updates have not reach the deadline, Snooze is also available. Otherwise Restart is the only option here.
Patch Management in ConfigMgr 2012 Beta 2 is fully functional now!
Now ConfigMgr 2012 Beta 2 is configured right (see my other blogs about ConfigMgr 2012 for that), the server must be get ready for Patch Management. On this server WSUS is installed, and the database is hosted on the SQL server. Default I change the rights on the WSUS root folder to Network Service - Full control. Otherwise error messages can be shown when synchronizing Software Updates. (For example: License agreement not ready)
Install the Software Update point role on the Site System server, and configure the role beneath Sites > Configure Site Components > Software Update Management Point. After that choose the "Software Library" tab, and click on "All Software Updates". This will still be empty then. In the Ribbon choose "Synchronize Software Updates" for starting a catalog sync. New Microsoft products in Site Components will become available now.
In ConfigMgr 2007 it was needed to create Search Folders, Update Lists, Deployment Templates, Deployment Management (advertisements) and Deployment Packages. This was a lot of work to create and maintain Software Updates. Because of that, most of time ConfigMgr 2007 and WSUS were keep separate. In ConfigMgr 2012 Beta 2 things are complete different (read: better)!
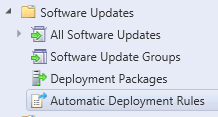
Now only the following items are available: All Software Updates (with the possibility to create Search Criteria), Software Update Groups, Deployment Packages and Automatic Deployment Rules.
The last one is immediately the most interesting. This because in "Automatic Deployment Rules", all functionality to automatically download Software Updates and deploy them to devices will be configured. That way it's not needed anymore to download Software Updates on a monthly base, and put them in an Update List. Just create an "Automatic Deployment Rules", and see it happen!
The "Automatic Deployment Rules" has the following functionality in it:
- The choice for creating a new Software Update Group (formely known as Update Lists in ConfigMgr 2007) or use an existing one
- Selecting the updates from product groups which must be used
- Configure the Deployment Schedule and User Experience (hide notifications, suppress reboots, and so on)
- The possibility for creating Alerts and download settings..
It's also needed to create a Deployment Package, for putting in the Software Updates. One package is enough put putting in all Software Updates, or choose to create a package for different products.
Create a Deployment Template now, for the Software Upgrade Group created before. Choose Deploy in the Ribbon, to create a new Deployment Template. There is also still the choice to set a Maintenance Window on the collections, to decide when updates must be installed.
Last reminder: look at the Group Policies if they are configured right. The following must be configured to get it working:
- Configure Automatic Updates > Disabled
(so that other people cannot change this setting)
- Specify intranet microsoft update service location > Enable
(put in here the SCCM server FQDN and Port Number)
Now all is configured for having Patch Management available!
Update: There were some questions about Patch Management in ConfigMgr 2012 from Daniel. I will answer them in this blog also, because they're handy to know:
1. I didn't find a way to define Search Folders. I only saw the possibility to save Custom Searches. Any ideas?
The idea of Search Folders is not existing anymore in ConfigMgr 2012. You are right about that. Now you can create multiple search criteria, with the possibility to save them. From the Ribbon - Search tab, it is possible to select the saved search criteria then. In my opinion a different approach, with the same result.
2. Where can I create and manage Deployment Templates?
As it seems for now, Deployment Templates are created automatically. The information needed is taken from the "Automatic Deployment Rules". Within the Software Update Groups, look down in the screen, and choose "Deployment" (next to Summary). Then the Deployment Template for that specific Software Update Group will be displayed. There can be multiple Deployment Templates created per Software Update Group.
3. I created a Deployment Rule and I choosed "new Software Update Group". But never asked for the name and after finished the wizard I didn't see any Software Groups.
I think the Patch Management functionality is not completed in this Beta release. This because there cannot be any existing Software Updates Group selected when creating or editing a "Automatic Deployment Rule". The choice is between Add to an existing, or Create a new one, but both without a choice. The best thing here, is wait till ConfigMgr 2012 is creating the Software Updates Group automatically. Even when selecting "Add to an existing", there will be a new Software Updates Group created, which is not what I want.
4. I also choosed to create a new Deployment Package and after finished the wizard I see the package. But where can I now start the download for the defined updates?
The Download for the defined updates can be started from the Ribbon also. Go to Software Update Groups for that, and start Download from the Ribbon there. Then the Download Wizard will be displayed, with the possibility to create or use a deployment package. Then this package will be displayed in the Console @ Deployment Packages.
----------------------------------------------------------------------
Hope I make things clear with Patch Management functionality in ConfigMgr 2012 this way. In my environment Software Updates are successfully deployed last weekend with ConfigMgr 2012, within the Maintenance Window!
This blog will dive deeper in Site roles. Beneath "Servers and Site System Roles" all Site servers and Site roles will be seen. Default the following roles will be seen on the Site server: Component server, Distribution point, Management point, Site database server, Site server and Site system.
They are the same Site roles that will be seen on a ConfigMgr 2007 server. New roles that can be added in ConfigMgr 2012 B2 are:
- Mobile device and AMT enrollment point
- Mobile device enrollment properties
- Application Catalog Web Service Point
- Application Catalog Web Site point
This because Mobile Device Manager is included in ConfigMgr now, and a new Application Catalog will be available on desktops with the ConfigMgr client installed. With this Application Catalog, users can "order" software, and after approval the application will be automatically installed!
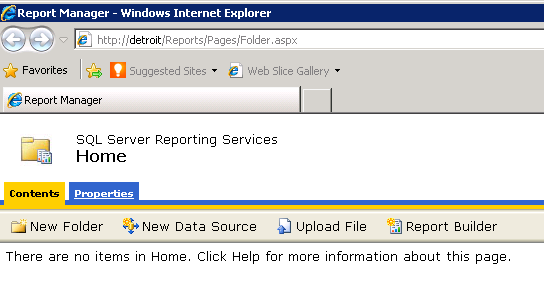
I have added roles for Application Catalog, Reporting Services, Server Locator, and Software Updates here. The Reporting Services role is mandatory when reporting is needed. This because the default Reporting role is not available in ConfigMgr 2012 anymore. Now Reporting Services is the way for watching reports. The advantage here is that this role can run on the SQL Server. This to devide the server load on multiple machines.
One role missing here is the PXE Services point. This role doesn't exist anymore in ConfigMgr 2012. Now PXE must be configured in the Distribution point role. So when searching for PXE functionality, check the DP role!
Last thing to show is the Server drive priority for putting Software packages. Default ConfigMgr 2012 B2 will decide where to put Software packages. This will be decide on the lowest priority order. At this moment it's not possible to change this priority on multiple drives. Maybe in a later release?
In the next blog Patch management will be explained, which is way different (read: better) then in ConfigMgr 2007.
My second blog about ConfigMgr 2012 B2 configuration! The first one were most about Discovery Methods and new collections. This blog will dive deeper in Site settings and Client settings. Both features are complete different when setting up in this new release. First have a look at the Site settings then.
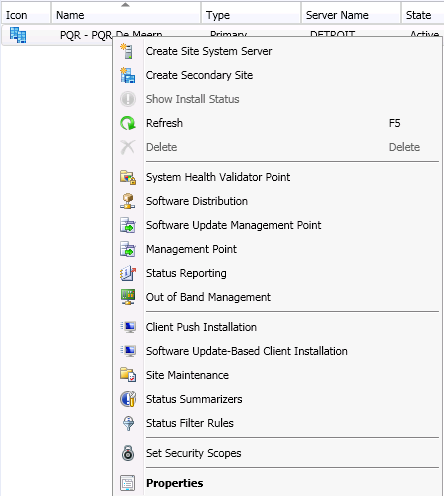
When right click on the Primary Site, many options are available. Things like adding a Secondary Site, Component Configuration, Client Agents, Site Maintenance, and so on are all here. This can also be accessible also from the new ribbon.
As you can see the same functionality is here. That's why I would recommend to use the ribbon as many as possible. When choosing Site properties some new functionality wil be seen. Let's have a look at the options. New in here are things like Alerts (used for free disk space on the ConfigMgr server), Sender and Client Computer Communication.
Mixed mode and Native mode doesn't exist anymore in ConfigMgr 2012. Now there is the choice between communication in HTTP and/or HTTPS. Nice thing is this can be decided per rol. For example: communication to the Distribution point can be configured in HTTP, while communication to the Management point is configured in HTTPS.
Also there's an option "Use HTTPS by using client certificate (client authentication capability) when available". This option can also be selected during installation "Clients will use HTTPS when PKI client certificate and HTTPS enabled site roles are available". This is a new feature, which will dynamically use HTTPS when there's PKI in place!
Now have a look at the Client Settings. In ConfigMgr 2007 there were multiple Client agent settings to configure. In this new release only one Client settings screen is available, "Default Client Agent Settings". This will have all functionality for all kind of Client settings onboard.
Things like Inventory, Power Management (default ON), Remote Tools and Software Updates can now be configured in one screen. This will be applied for all ConfigMgr clients. It's also possible to create "Custom Client Settings". Then customized settings for devices or users will overrule the default Client Agent settings. Nice to see that Client Agent settings are organized now!
In the next blog Site roles will be explained.
Today I installed ConfigMgr 2012 Beta 2 again with my PQR collegue Stephan Wibier. Now also the default configuration (Administration) is done, for getting new functionality to work. This installation will be used to manage the virtual (www.virtuall.eu) environment, and will also be used for Patch management. We have seen many new functionalities today! Till now they are all improvements!
First I have added Domain Admins in Administrative Users, so my other PQR collegues can also make use of the new ConfigMgr functionality! Now let's start to configure ConfigMgr 2012 B2! First I go to Discovery Methods. New in here is "Active Directory Forest Discovery". When enabling this feature there are two (2) checkboxes. These will be automatically add the boundaries for you! Now is that handy or not?
When enabling other Discovery Methods (for example: Active Directory Security Group, System or System Group discovery) a full discovery will be run automatically. Also "Enable delta discovery" is enabled by default now. The only discovery method enabled by default (after a fresh installation) is the Heartbeat Discovery. The new items will soon be displayed in the collections.
After this collections will be filled beneath "Assets and Compliance". There are now less collections then ConfigMgr 2007. Things are organized better now! There will be default collections for Users, Devices, User Collections and Device Collections. Beneath User and Device Collections are the additional collections. These will be displayed for make it clearer.
New User collections are:
New Device collections are:
The console performance is must better then before! This because it's running in Silverlight now. Functionality in the ConfigMgr console is found on a logical place now. No searching for options anymore, but just find it quick and easy with the new ribbon! In every step in the ConfigMgr console, the ribbon is available! No/less right clicking anymore..
This is functioning all well, what a great product/upgrade this is! Also the different tabs (also found in other Microsoft products) are in place now: Administration, Software Library, Monitoring & Assets and Compliance.
More soon!
When installing ConfigMgr 2007 on a clustered SQL Server Instance, specific configuration is needed. Then preparing for a ConfigMgr installation must happen on all servers which are part of the SQL cluster. How that works I will explain in this blog. Because it's not always usual to install ConfigMgr on a clustered SQL Server Instance, remember to follow these steps!
First open this TechNet article: How to Install Configuration Manager Using a Clustered SQL Server Instance, which can be found on http://technet.microsoft.com/en-us/library/bb680513.aspx
The steps which are needed:
- Create the virtual SQL Server cluster to host the site database on an existing Windows Server cluster environment.
- Add the machine account of the primary site server machine to the Local Administrators group of each Windows Server cluster node computer. This is required to allow the site server to install and configure settings later.
- In the virtual SQL Server instance, assign the sysadmin SQL Server role to the user account running Configuration Manager Setup.
- Start Configuration Manager Setup, and select to install Configuration Manager using custom settings.
- On the Configuration Manager Database Server page of the Configuration Manager Setup Wizard, enter the name of the clustered virtual SQL Server instance to host the site database and the name for the site database to be created on that instance by setup.
Important: During setup, you must enter the name of the virtual SQL Server cluster instance, and not the virtual Windows Server name created by the Windows Server cluster. Installing the site database using the Windows Server cluster virtual instance name will result in the site database being installed on the local hard drive of the active Windows Server cluster node, and it will prevent successful failover if that node fails.
Also have a look at "To verify that the site database was installed successfully", to check if installation was done right!
But what to do when things goes wrong?
The following errors can be shown:
SQL Server sysadmin rights: Either the user account running Configuration Manager Setup does not have sysadmin SQL Server role permissions on the SQL Server instance targeted for site database installation or the SQL Server instance could not be contacted to verify permissions. Setup cannot continue.
SMS Provider Communication: A communication error has been detected between the SMS Provider computer and the site database computer. This error can occur when the site database server is offline or if a valid SPN has not been registered in Active Directory Domain Services for the SQL Server instance hosting the site database. Setup cannot continue.
When this errors are seen during setup (or during prerequisite check), check the following steps:
- Is the machine account of the primary site server added to the Local Administrators group of each Windows Server cluster node computer?
- Is the virtual SQL Server instance, with the sysadmin SQL Server role assigned to the user account running Configuration Manager Setup?
- Is the name of the virtual SQL Server cluster instance entered during setup? (format: SQL Server cluster name\Instance name)
The solution was found with configuring the clustered SQL Server Instance right:
- The Service Pack level from the clustered SQL Server and the new Instance created must be on the same level.
- Because the new Instance must be installed on each Windows Server cluster node computer, make sure the installation (database/log) paths are same on each node.
- Make sure permissions are set right on the clustered SQL Server Instance. (double check)
This can also be validated using "ODBC Data Source Administrator". Choose the System DSN tab, and add the clustered SQL Server Instance. This because it has nothing to do with ConfigMgr, but all with SQL Server configuration.
I hope this information will be useful for future installations!
On 23 march 2011 during MMS 2011 in Las Vegas, ConfigMgr 2012 Beta 2 is released. Because I'm doing ConfigMgr implementations most of times, I want to know which changes are made during installation. In this blog the setup of this new release is viewed, to see if there are any differences between previous releases. This installation is done on a Windows Server 2008 R2 Enterprise x64 server.
Let's download first the new Beta release "ConfigMgr_2012_Beta2_ENU_7561" on Technet Downloads: http://technet.microsoft.com/en-us/bb403698
Unpack the file, and start Splash.hta for starting the setup. The following screen will be seen then, which has many new options in it:
When choosing INSTALL a message is displayed that DotNet Framework 3.5 SP1 and 4.0 are needed for starting the installation. So let's see first what's needed on the server for having a successful installation:
- DotNet Framework 3.5 SP1 and 4.0 (with default IIS Role Services)
- SQL Server 2008 SP1 with Cumulative Update 10 or higher (SP2 and R2 are not supported yet)
- Remote Differential Compression (RDC)
- Background Intelligence Transfer Service (BITS)
- Windows Server Updates Servies (WSUS) > (optional)
- IIS Role Services > IIS 6 WMI Compatibility
Then the installation begins..
Next in line after this screen are:
- Available Setup Options (Primary Site Server, Central Administration Site, Recover a Site Server)
- Microsoft Software License Terms
- Updated Prerequisite Components (14 items till now)
- Site and Installation Settings (Site Code, Site Name)
- Primary Site Installation (install a standalone site, or join an existing hierarchy)
- Database Server (SQL Server 2008 SP1 with cumulative update 10 is needed)
When this error message is displayed after installing SQL Server 2008 SP1 with cumulative update 10, the TCP/IP protocol must be enabled.
Start "SQL Server Configuration Manager" for that, choose Protocols, and enable TCP/IP. Then restart SQL Server service for make changes active.
Now the installation can be continued:
- SMS Provider Settings (cannot be installed on a clustered SQL server)
- Client Computer Communication Settings (Native or Mixed mode)
- Site System Roles (Choose HTTP or HTTPS for MP or DP, this can be choosen per rol)
- Customer Experience Improvement Program Configuration
- Setting Summary
- Prerequisite Check
- Install.. (this takes a while..)
After that ConfigMgr 2012 Beta 2 is installed! Not that hard I think?
Next blog will zoom deeper in configuring this new ConfigMgr release! I'm very excited about this new ConfigMgr release! I hope you are too!
Thanks to my PQR collegue Stephan Wibier, for the SQL (TCP/IP protocol) advise!