Showing posts with label Images. Show all posts

Thursday, August 25, 2011

Troubleshooting Windows Deployment Services

When having ConfigMgr installed, Windows Deployment Services (WDS) will be used also. This is necessary for having PXE boot functionality available. But what to do if WDS is not working anymore, so no OS deployment is possible? Last week I had the oppurtunity to troubleshoot this myself. In this blog I will explain the error message and the solution for this also.

First, for having a look at WDS functionality have a look a this blogpost: http://henkhoogendoorn.blogspot.com/2011/06/windows-deployment-services-on-server.html

In this case the WDS service wasn't starting anymore. In Event Viewer the following error message was seen: 
  • Faulting application svchost.exe_WDSServer, version 6.0.6001.18000, time stamp 0x47919291, faulting module wimgapi.dll, version 6.1.7600.16385, time stamp 0x4a5bc365, exception code 0xc0000005, fault offset 0x0000000000032a8e, process id 0xc4c, application start time 0x01cc51b67426d7ba.

When looking at the error message different solutions are available. A few of them mentions the following: 
  • I had the same problem after adding a NIC driver to my boot image. The solution for me was to re-update the PXE distribution point. Then the WDS service starts. No need to re-install WDS and PXE service point.
  • Had exactly the same issue. Re-updated the distribution points for boot images and then WDS started without any issues.
  • I had to install the PXE Service Point and WDS. After that the WDS service started successfully.
 
Unfortunately this wasn't the solution here. There was also the possibility to install the PXE Service Point and WDS again. Then the following steps are needed:
  1. Uninstall the PXE Service Point. Monitor the PXESetup.log and make sure it uninstalls correctly.
  2. Once the PXE Service Point has successfully uninstalled, uninstall WDS. Once the WDS uninstall is complete, reboot the server.
  3. Once the server is rebooted, rename the RemoteInstall folder on the root level of all drives. Make sure to check all drives and to rename all of the RemoteInstall folders. Not all drives may contain a RemoteInstall folder and usually only one of the drives has a RemoteInstall folder. When renaming the folder, it may break an existing share. It is OK to go ahead and break this share.
  4. Reinstall WDS. Once WDS is finished reinstalling, reboot the server.
  5. Once the server has restarted, in the ConfigMgr 2007 Admin Console, add the PXE Service Point role.
  6. Monitor the PXESetup.log and make sure that installation was successfully. If the PXESetup.log prompts for the server to be rebooted, make sure to reboot the server.
  7. Once the PXE Service Point has been successfully installed (and if necessary, the server restarted), check to make sure that the WDS service has started. If it has not started, try to manually start it.
In my case I tried the following. That way it wasn't needed to install both PXE Service Point and WDS again:

Just add new Boot images after that when needed.
Remember the following here: To import a custom boot image, the boot image must already be finalized or the SMS Provider will reject it.

Tuesday, June 28, 2011

Microsoft Deployment Toolkit (MDT) 2010 explained

Last week I used an existing Microsoft Deployment Toolkit (MDT) 2010 installation on a Windows Server 2008 server. This for creating a new Windows 7 SP1 image and deploying it also. Most of times I install MDT for ConfigMgr integration only. Now for me the change to see MDT features and functionality. In this blog we have a look at the setup and choices made during configuration.

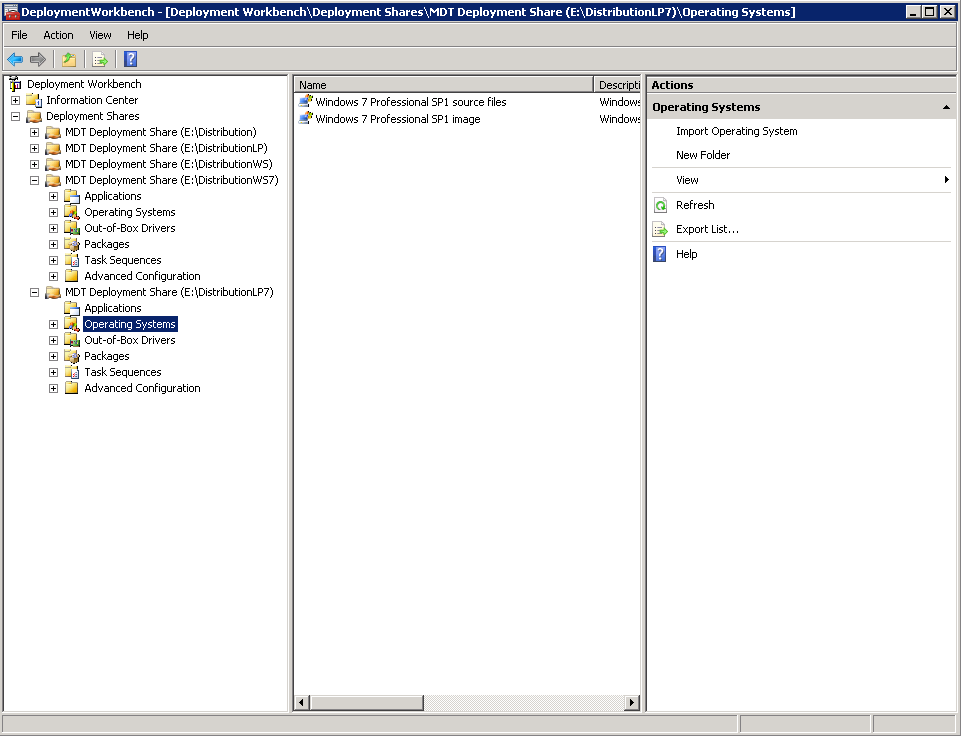
There was already an MDT installation present; this because of Windows XP deployment. Therefore I decided to create a new Deployment Share first. A Deployment Share is the place where packages, drivers and applications will be placed. This is a real share on the disk, so Deployment Share is a good chosen word here.

In MDT 2008 it was necessary to create an additional Deployment Point also. In MDT 2010 this is not needed anymore. All components are placed on a single Deployment Share now. There can be multiple Deployment Shares if you want. This for using different INI-files needed (for example). Multiple Deployment Shares can be opened at the same time in the MDT console. These can be linked, so that when content is changed, it will be updated on the other share(s) also.

After that importing an Operating System image is needed. This can be done with a "Full set of source files" from installation media. The best thing to do is to start a "Standard Client task sequence" to create a new OS image. Just make sure that an image capture is configured in the task sequence used for creating a OS image.

The OS image created can be imported again later to make it available in other task sequences. Select then the "Custom image file" in the "Standard Client task sequence". This task sequence (used for deployment) can be included applications, drivers and motifications also.

Best practice for the task sequence used for capturing, is not including an administator password and product key in it. Also the device used for capturing must be a workgroup member. The administator password and product key can be configured later during deployment.

Now have a look at the Deployment Share properties. These include the Bootstrap.ini and Rules (customsettings.ini) files. These settings will determine  the behaviour during Operating System Deployment. After that an update is needed on the Deployment Share, which will also create the necessary ISO and WIM files (again) needed for Boot functionality.

Make sure to update the Boot image files on Windows Deployment Services (WDS) when new settings are placed in the Bootstrap.ini file. Otherwise it will not be functional when starting a new image deployment.
Note: When using "_SMSTSORGNAME=" the IT Organization name can be changed during task sequence progress.

The ISO file can be used to burn on CD/DVD or USB device for booting from media. The WIM file can be used in Windows Deployment Services (WDS) for booting with PXE boot. Just press F12 during startup en see the magic happen. After choosing the right Boot image, the OS deployment can start without any other messages displayed. In this environment only the computername is needed. That's all needed!

It's nice to see that MDT 2010 is easy to setup and not that hard to use for OS deployment. Just configure the necessary steps needed, and OS deployment will be available. MDT 2010 is (without the usage of ConfigMgr) still a very good deployment solution!

The most common error during re-deployment was the following one:
Property LTISuspend is now = Litetouch has encountered an Environment Error (Boot into WinPE!).
If booting from a USB Flash Disk, please remove all drives before Retrying.
Otherwise, ensure the hard disk is selected first in the boot order of the BIOS.


This because after deployment there may be still C:\MININT or C:\_SMSTaskSequence folders left. When OS deployment is done these folders are not necessary anymore and can be deleted.

The best way for doing this is start from Windows PE and open a command shell. Type in the following commands then: (1) Diskpart (2) Select Disk 0 (3) clean. After that start over again in Windows PE and OS deployment will be functional then.

One last solution is using Johan Arwidmark's Final Configuration script. This script will clean out any Leftover MININT or Sysprep folders. Enable WindowsUpdate, Set a default domain value (read from the JOINDOMAIN environment variable), and then do a proper final reboot. It can be found here: http://www.deployvista.com/Blog/tabid/70/EntryID/61/language/en-US/Default.aspx

Note: You need to set SkipFinalSummary=YES in customsettings.ini (the script will check for it)

Thanks to Anton van Pelt, Twitter: @antonaustirol25 for sharing his knowledge on this!

Thursday, June 16, 2011

Windows Deployment Services on Server 2008 R2

Yesterday I installed Windows Deployment Services (WDS) on a Windows Server 2008 R2 server. A good possibility to see the new features available in this release. Most of times I install WDS needed for ConfigMgr installations. Then there's no need to configure WDS; this will be left unconfigured then. In this blog we have a look at the new features in this release.

First install the WDS role on a Windows Server 2008 R2 server. By default both Deployment Server and Transport Server will be installed. After that configuration must be done. Just import Boot Images, and create Capture Images from that. Then there's the possibility to add images for all kind of Windows editions. In this release there's no support available for RIS (Remote Installation Services) anymore. This was formerly known as "Legacy Images" in Windows Server 2003 editions.


Let's have a look at the console now. There will be default folders for Install Images, Boot Images, Pending Devices, Multicast Transmissions and Drivers in it. Drivers has default folders for All Packages and DriverGroup1 in it. What's the meaning of this folders?:
  • Install Images: All Images used for Windows deployment, with the possibility to create folders for overview;
  • Boot Images: Specific Images used for deploying and capturing new OS Images;
  • Pending Devices: Once this setting is enabled, you can approve and reject computers in the pane;
  • Multicast Transmissions: Once created, Windows Deployment Services will transmit the image to multiple clients using a single transmission, instead of one transmission for each client;
  • Drivers: New folder for creating driver packages and driver groups;
  • All Packages: You can use Windows Deployment Services to add driver packages to the server and configure them to be deployed to client computers along with the install image;
  • DriverGroup1: You can use filters to map client computers to the packages in a driver group. The filters define which clients will install the drivers.

As mentioned before there are new features in this release. These are Multicast support and additional Driver packages for deployment. That way there's no need to create multiple OS Images for all kind off type devices. Just create multiple Driver packages and add them to the default image; with the use off a query. Let's have a look at all the new functionality.

Multicast: Transmission Name: This wizard creates a multicast transmission for an image. Once created, Windows Deployment Services will transmit the image to multiple clients using a single transmission, instead of one transmission for eacht client. This can significantly reduce the amount of network bandwidth that is used.

Rightclick on Drivers will show these options.

"Add Driver Package" will let you choose between driver packages from an .inf file or a specific folder with drivers. Once the packages are on your server, you can define which client computers will install them using driver groups and you can add them to boot images.

"Add Driver Group" will create a new driver group which can be used to create a collection of driver packages. This wizard helps you define these clients based on the client's hardware and the install image that is selected during setup.

There are also more possibilities with "Enable/Disable Driver Packages" and "Delete Driver Packages".

Rightclick on DriverGroup1 will show these options.

Choose Properties to create new filters. You can use filters to define which clients install the driver packages in this group, based upon the hardware of the installing client and the install image that the client chooses.
When adding a new filter there is the choice between: Manufacturer, Bios Vendor, Bios Version, Chassis Type, UUID, OS Version, OS Edition and OS Language.

There are also more possibilities with "Modify Filters for this Group" and "Add Driver Packages to this Group".

With WDS on Server 2008 R2 there's better support for multiple devices now! No need to create multiple OS Images anymore; just create multiple driver packages for that. With Multicast support bandwidth can be saved, when multiple devices must be re-installed during working hours. It's good to see that WDS without the need of MDT and/or ConfigMgr is a goodworking solution for deployment.