Showing posts with label MDT. Show all posts

Friday, March 6, 2015

Network selection during Windows 8.x deployment in MDT and ConfigMgr

When deploying Windows 8.x with MDT or ConfigMgr, deployment may stop at the network selection screen. When press Connect in the selection screen, deployment will continue. Within this blogpost I show you how to skip network selection.
 
Within MDT:
The CustomSettings.ini (which can be found on Properties, Rules on the Deployment Share) needs to be changed as follows:
 
<OOBE>
   <HideEULAPage>true</HideEULAPage>
   <NetworkLocation>Work</NetworkLocation>
   <ProtectYourPC>1</ProtectYourPC>
   <HideLocalAccountScreen>true</HideLocalAccountScreen> 
 <HideOnlineAccountScreens>true</HideOnlineAccountScreens> 
 <HideWirelessSetupInOOBE>true</HideWirelessSetupInOOBE>

</OOBE>
 
Within ConfigMgr:
The unattend file (additional file which can be used in the Apply Operating System step) needs to be changed as follows:
 
<?xml version="1.0" encoding="utf-8"?>
<unattend xmlns="urn:schemas-microsoft-com:unattend">
    <settings pass="oobeSystem">
        <component name="Microsoft-Windows-Shell-Setup" processorArchitecture="amd64" publicKeyToken="31bf3856ad364e35" language="neutral" versionScope="nonSxS" xmlns:wcm="http://schemas.microsoft.com/WMIConfig/2002/State" xmlns:xsi="http://www.w3.org/2001/XMLSchema-instance">
            <OOBE>
                <HideEULAPage>true</HideEULAPage>
                <HideWirelessSetupInOOBE>true</HideWirelessSetupInOOBE>
                <NetworkLocation>Work</NetworkLocation>
                <HideOnlineAccountScreens>true</HideOnlineAccountScreens>
                <HideOEMRegistrationScreen>true</HideOEMRegistrationScreen>
                <HideLocalAccountScreen>true</HideLocalAccountScreen>
            </OOBE>
            <RegisteredOwner>Microsoft</RegisteredOwner>
        </component>
    </settings>
    <cpi:offlineImage cpi:source="" xmlns:cpi="urn:schemas-microsoft-com:cpi" />
</unattend>


For x86 systems, change "amd64" in "x86" to get the job done.
 
Source locations:
Windows 8.1 deployment in MDT 2013
Windows 8.1 prompting for network (some lines missing)
When using the script from TechNet, the red lines are missing. Therefore an error message is displayed during mini-setup (about /unattend) and deployment stops on that point. Now way you can pass a deployment error during mini-setup, so just use the unattend file mentioned here. Hope it helps!

Thursday, November 13, 2014

MDT 2013 - Deploy Multiple Windows versions with a single Deploymentshare

When deploying an Windows image in MDT 2013 you can add rules in CustomSettings.ini to offer a product key during deployment (for example). Settings in this ini file are used to create the unattend file, which is needed during mini-setup. Just add the following rules for skipping the product key:
-SkipProductKey=YES
-ProductKey=AAAAA-BBBBB-CCCCC-DDDDD-EEEEE

When using multiple Windows versions however, this will not do the job. In that case add the product key in the deployment task sequence(s). Just add it at start in the task sequence, beneath the Initialization phase. Just name the variable ProductKey and enter a KMS Client Setup Key (for example). It's just that simple ;)

When looking for KMS Client Setup Keys have a look here: http://technet.microsoft.com/en-us/library/jj612867.aspx

Just love MDT because of simplicity and functionality!

Wednesday, November 12, 2014

Sysprep and Capture task sequence fails when capture a Windows 8.x image

Last week I created a Windows 8.1 Update 1 image with MDT 2013. During the Sysprep and Capture proces, the following error message came up. Time to take some action if you ask me! ;)

Looking on Microsoft TechNet the following answer was found:
This problem occurs because the LTIApply.wsf script fails to check for the existence of the boot folder on the system partition before the script runs the takeown.exe command to change ownership on the folder. The takeown.exe command fails with a "Not Found" error if the boot folder doesn't exist. This causes the Sysprep and Capture task sequence to fail.

For the workaround have a look here: https://support.microsoft.com/kb/2797676?wa=wsignin1.0

Great it works that way!

Wednesday, October 29, 2014

MDT 2013 - The task sequence has been suspended

During deployment with MDT 2013, after a few working deployments, the following message is displayed: "The task sequence has been suspended". After that the system is rebooting and you can start all over again. This because of the following problem: you have to wipe the disk to continue. Just press F8 during Windows PE and type in the following commands:
1. Diskpart
  2. List disk
    3. Select disk 0
      4. List part
        5. Select part 1
          6. Clean
            7. Create part primary
              8. Assign
                9. Active
                  10. Exit


After that deployment works as Always!

Tuesday, October 28, 2014

No IP-address set during MDT Sysprep and Capture

Last week I created a Windows 7 SP1 image manually, installed almost 200 updates in it (!) and started the MDT 2013 default task sequence "Sysprep and Capture". The first part went fine (Sysprep), but when in Windows PE there was no IP-address set. Oops! Lucky me you can start a command prompt and start "Retry" later. Let's have a look how to enter a static IP-address within Windows PE.
 
Just start Command Prompt with F8 and type in the following command: "Netsh interface ip show config" > which is showing that my interface is called "Ethernet0"
After that type in the command: "Netsh interface ipv4 set address “Ethernet0” static <IP address> <Subnet mask <Gateway>" 

After that it was possible to capture Windows 7 SP1 successfully!

This simply made my day! ;)

Tuesday, March 4, 2014

How to add devices to different OU’s during deployment

In ConfigMgr it's possible to use a WMI query for Hardware vendor, type or model or part of computername (for example). In my situation I want to use a single task sequence for both desktop and laptop/ notebook deployments. This because to select different OU's during deployment. Let's have a look how to do that.
 
Within MDT you can use a variable like IsLaptop equals “True” or IsDesktop equals “True”. Within ConfigMgr I never used these before (while they are supported as well). There is another method however, besides of using part of computername. In this case you can run a WMI query to detect the hardware type.

My preferred method is as follows:
SELECT * FROM Win32_ComputerSystem WHERE PCSystemType = 1
SELECT * FROM Win32_ComputerSystem WHERE PCSystemType = 2
Example: 1 is for desktops and 2 is for laptops/notebooks.

If you want to combine multiple types, then use an "If statement" to the task sequence step, and specify multiple WMI queries. When using a single task sequence for both desktops and laptops/notebooks, use "Apply Network Settings" twice, with both a different WMI query.

When looking for more hardware types, use the following table:
  • 0 (0×0) Unspecified
  • 1 (0×1) Desktop
  • 2 (0×2) Mobile (Laptop/Notebook)
  • 3 (0×3) Workstation
  • 4 (0×4) Enterprise Server
  • 5 (0×5) Small Office / Home Office Server
  • 6 (0×6) Appliance PC
  • 7 (0×7) Performance Server
  • 8 (0×8) Maximum
 
Hope it helps!

More blogposts on this topic:
Chassis Types and query-based Collections (part 2)

Friday, January 13, 2012

Deploy Windows Thin PC (WinTPC) with MDT 2010

Last year, on July 1, 2011 actually, Windows Thin PC (WinTPC) is released. WinTPC images are smaller than Windows 7 images, and hence have a lower attack surface.

WinTPC is an Microsoft Software Assurance (SA) benefit that provides a low footprint, locked down version of Windows 7 that enables organizations to repurpose existing PCs as thin clients, thereby reducing the need for new thin client hardware. And since these PCs retain their existing SA coverage, they do not need any additional Windows Virtual Desktop Access (VDA) licensing for VDI. 

WinTPC offers an excellent thin client experience by locking down the PC through write filters, while still providing users with a superior remote desktop experience through RemoteFXTM support. IT can deploy and manage WinTPC images to multiple PCs using System Center Configuration Manager (SCCM), and push updates to these PCs using Windows Update or Windows Server Update Services (WSUS).

Additionally, WinTPC leverages Windows Enterprise features such as BitLocker and AppLocker to further secure the endpoint. With BitLocker and BitLocker To Go technology WinTPC disk drives and flash storage can be encrypted, thereby ensuring that any data stored on disk is secure. With AppLocker, IT can prevent unauthorized applications from running on WinTPC.


WinTPC is a locked down version of Windows 7, and hence, will be able to run on any device capable of running Windows 7. The recommended specifications for running Windows Thin PC are:
  • 1 GHz or faster 32-bit (x86) processor
  • 1 GB RAM
  • 16 GB available hard disk space

WinTPC can be deployed with ConfigMgr 2007 and MDT 2012. With MDT 2010 it's possible also, but then a unattend.xml change is needed. As mentioned in Windows Thin PC: Another flavor of Windows 7 the <UpgradeData> section from the unattend.xml that you use to deploy WinTPC must be removed then. Then it's working in MDT 2010 also. WinTPC can be deployed in just 15 minutes with MDT usage!

For managing WinTPC the normal Windows 7 Group Policies can be used. That way even more functionality can be excluded from the already stripped version of Windows 7. With write filters the disk partition can be keeped clean. WinTPC has both file-based and enhanced write filters. Write filters can be enabled to prevent users and applications from writing to disk, and hence ensure that the OS returns to a pristine image on every reboot.

With WinTPC you can have a fast Windows 7 version on almost all types of hardware which have Windows XP or Vista support. Just install the OS and have a look at yourself. Download 90 days trial

Friday, December 2, 2011

MDT 2012 Beta 2 integration in ConfigMgr 2012 RC

On 10 november 2011 the Beta 2 of Microsoft Deployment Toolkit (MDT) 2012 is released. MDT 2012 can be used as a single OS deployment solution, but can also be used for ConfigMgr 2012 RC integration. In this blog I will describe the installation, integration and new functionality.

What's new in MDT 2012 Beta 2:
MDT 2012 Beta 2 offers new User-Driven Installation components and extensibility for Configuration Manager 2007 and Configuration Manager 2012 as well as integration with the Microsoft Diagnostics and Recovery Toolkit (DaRT) for Lite Touch Installation remote control and diagnostics.

Key benefits include:
  • Full use of the capabilities provided by System Center Configuration Manager 2012 for OS deployment.
  • Improved Lite Touch user experience and functionality.
  • A smooth and simple upgrade process for all existing MDT users.

First download Microsoft Deployment Toolkit 2012 Beta 2 on Microsoft Connect: https://connect.microsoft.com/site14/Downloads/DownloadDetails.aspx?DownloadID=8689

Make sure ConfigMgr 2012 RC is installed for this integration. This is decribed here: Installing the ConfigMgr 2012 Release Candidate (RC)

Then install MDT 2012 Beta 2 with the default features.

After installation start "Configure ConfigMgr Integration".

The next screen will be displayed then:
All needed values are filled in by default, so move on. When installation is all fine "Operation completed successfully" is displayed.

Start the ConfigMgr 2012 RC console for new MDT features now.

Beneath Software Library > Operating Systems > Task Sequences, the following option is added:
Choose "Create MDT Task Sequence" for a new task sequence with MDT functionality.

For people who used MDT 2010 integration in ConfigMgr 2007, this screen looks very familiar.

It is also possible to select MDT features in existing task sequence. Just edit them, and choose Add > MDT

Have a look at my older blogpost for more explanation of all choices: MDT integration in ConfigMgr 2007

Beneath Software Library > Operating Systems > Boot Images, the following option is added:
Choose "Create Boot Image using MDT" for a new boot image with MDT functionality.

At last you can use the build-in scripts that's included with MDT, for using in ConfigMgr 2012 Task sequences. With MDT integration in ConfigMgr 2012 you have the best of both worlds. And with new functionality in MDT 2012 here is even more available! (User Driven Installation)

Monday, September 5, 2011

Integration with Configuration Manager 2007/2012

With System Center Configuration Manager (ConfigMgr) 2007 there is many functionality available by default. With ConfigMgr 2012 this becomes even better, even MORE functionality will be in it. With both solutions there is the possibility to extend ConfigMgr with additional functionality. In this blog I will describe the most important ones.

Microsoft Deployment Toolkit (MDT) 2010: Adding new Task Sequences, new options in Task Sequences, new Boot images and all build-in scripts in ConfigMgr. Have a look at this blogpost(s) for more information about this:
http://henkhoogendoorn.blogspot.com/2010/12/mdt-integration-in-configmgr-2007.html
http://henkhoogendoorn.blogspot.com/2011/06/microsoft-deployment-toolkit-mdt-2010.html

Application Virtualization (App-V): Adding App-V streaming functionality in ConfigMgr, so no App-V Management and/or Streaming server is needed anymore. Just publish and update App-V packages from within the ConfigMgr console! Have a look at this blogpost(s) for more information:
http://henkhoogendoorn.blogspot.com/2010/12/configmgr-2007-with-app-v-integration.html
http://henkhoogendoorn.blogspot.com/2011/06/configmgr-2012-beta-2-with-app-v.html

ForeFront Endpoint Protection (FEP) 2010: It is possible to fully manage ForeFront from within the ConfigMgr console. Just deploy the ForeFront clients and manage policies with ConfigMgr. Definition files can be downloaded with WSUS integration in ConfigMgr. More about that on TechNet: http://technet.microsoft.com/en-us/library/cc161958.aspx

User State Migration Tool (USMT) 4.0: With USMT it is possible to store files and/or settings during OS deployment migrations. With hard-link migration it is possible to migrate user accounts, files and settings in less time using megabytes of disk space instead of gigabytes. More about that can be found here: http://technet.microsoft.com/en-us/library/dd560752(WS.10).aspx

Windows Server Updates Services (WSUS): Manage Software updates in ConfigMgr instead of WSUS, with even more control during installation. That way all management can be done in one single console, and additional ConfigMgr functionality as Maintenance Windows can be used. Have a look at this blogpost for this:
http://henkhoogendoorn.blogspot.com/2011/04/patch-management-in-configmgr-2012-beta.html

System Center Updates Publisher (SCUP) 2011: When ConfigMgr and WSUS is used (both together), SCUP can be installed for non-Windows patches. That way patches from HP, Dell, Adobe and Java (for example) can be managed and deployed in WSUS integration in ConfigMgr! How to setup, is explained here: http://blogs.technet.com/b/jasonlewis/archive/2007/11/30/how-to-setup-scup-and-configmgr-2007-to-deploy-custom-updates.aspx

System Center Configuration Manager 2007 Toolkit V2: The Configuration Manager 2007 Toolkit V2 contains 11 downloadable tools to help you manage and troubleshoot Configuration Manager 2007. It can be downloaded here: http://www.microsoft.com/download/en/details.aspx?id=9257

Right Click Tools or SCCM Console Extensions: The Right Click Tools or SCCM Console Extensions installation adds additional functionaly for server and client management. It becomes very handy during management and troubleshooting. More information can be found here:
http://myitforum.com/cs2/blogs/rhouchins/archive/2008/04/09/sccm-right-click-tools.aspx
http://myitforum.com/cs2/blogs/direland/pages/sccm-console-extensions.aspx

System Center Client Center: This tool is designed for IT Professionals to troubleshoot SMS/SCCM Client related Issues. The SCCM Client Center provides a quick and easy overview of client settings, including running services and SCCM settings in a good easy to use, user interface. Download it here:
http://sourceforge.net/projects/smsclictr/

With these tools more possiblities becomes available in ConfigMgr. Hopefully you have experienced new ideas with these products, and maybe more enthousiastic now to extend ConfigMgr functionality! Stay tuned for more later.

Tuesday, June 28, 2011

Microsoft Deployment Toolkit (MDT) 2010 explained

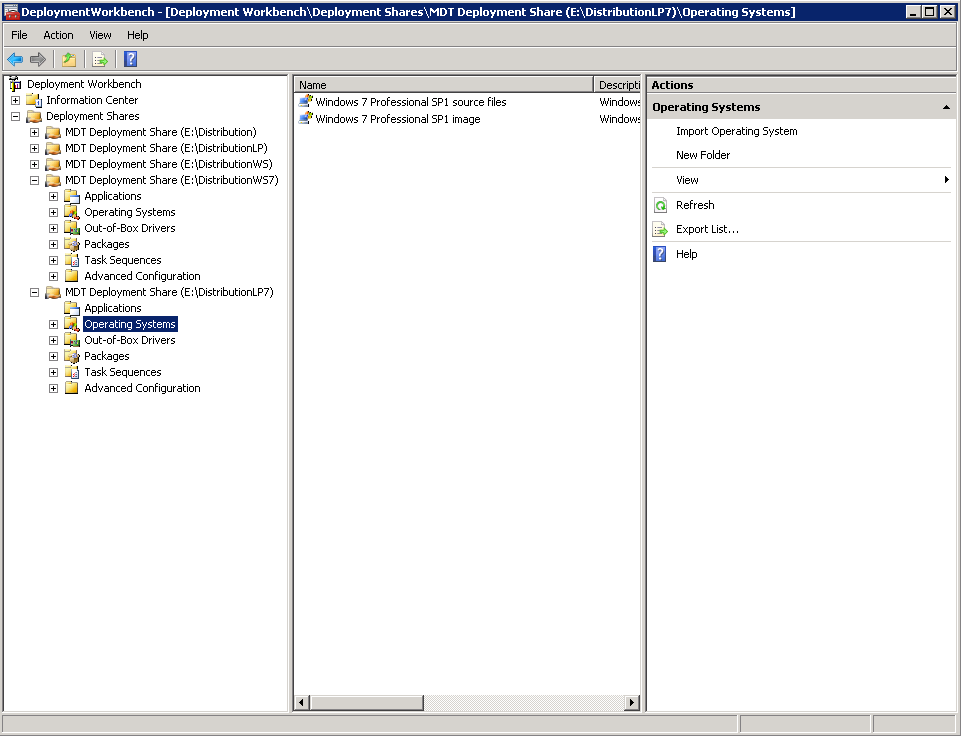
Last week I used an existing Microsoft Deployment Toolkit (MDT) 2010 installation on a Windows Server 2008 server. This for creating a new Windows 7 SP1 image and deploying it also. Most of times I install MDT for ConfigMgr integration only. Now for me the change to see MDT features and functionality. In this blog we have a look at the setup and choices made during configuration.

There was already an MDT installation present; this because of Windows XP deployment. Therefore I decided to create a new Deployment Share first. A Deployment Share is the place where packages, drivers and applications will be placed. This is a real share on the disk, so Deployment Share is a good chosen word here.

In MDT 2008 it was necessary to create an additional Deployment Point also. In MDT 2010 this is not needed anymore. All components are placed on a single Deployment Share now. There can be multiple Deployment Shares if you want. This for using different INI-files needed (for example). Multiple Deployment Shares can be opened at the same time in the MDT console. These can be linked, so that when content is changed, it will be updated on the other share(s) also.

After that importing an Operating System image is needed. This can be done with a "Full set of source files" from installation media. The best thing to do is to start a "Standard Client task sequence" to create a new OS image. Just make sure that an image capture is configured in the task sequence used for creating a OS image.

The OS image created can be imported again later to make it available in other task sequences. Select then the "Custom image file" in the "Standard Client task sequence". This task sequence (used for deployment) can be included applications, drivers and motifications also.

Best practice for the task sequence used for capturing, is not including an administator password and product key in it. Also the device used for capturing must be a workgroup member. The administator password and product key can be configured later during deployment.

Now have a look at the Deployment Share properties. These include the Bootstrap.ini and Rules (customsettings.ini) files. These settings will determine  the behaviour during Operating System Deployment. After that an update is needed on the Deployment Share, which will also create the necessary ISO and WIM files (again) needed for Boot functionality.

Make sure to update the Boot image files on Windows Deployment Services (WDS) when new settings are placed in the Bootstrap.ini file. Otherwise it will not be functional when starting a new image deployment.
Note: When using "_SMSTSORGNAME=" the IT Organization name can be changed during task sequence progress.

The ISO file can be used to burn on CD/DVD or USB device for booting from media. The WIM file can be used in Windows Deployment Services (WDS) for booting with PXE boot. Just press F12 during startup en see the magic happen. After choosing the right Boot image, the OS deployment can start without any other messages displayed. In this environment only the computername is needed. That's all needed!

It's nice to see that MDT 2010 is easy to setup and not that hard to use for OS deployment. Just configure the necessary steps needed, and OS deployment will be available. MDT 2010 is (without the usage of ConfigMgr) still a very good deployment solution!

The most common error during re-deployment was the following one:
Property LTISuspend is now = Litetouch has encountered an Environment Error (Boot into WinPE!).
If booting from a USB Flash Disk, please remove all drives before Retrying.
Otherwise, ensure the hard disk is selected first in the boot order of the BIOS.


This because after deployment there may be still C:\MININT or C:\_SMSTaskSequence folders left. When OS deployment is done these folders are not necessary anymore and can be deleted.

The best way for doing this is start from Windows PE and open a command shell. Type in the following commands then: (1) Diskpart (2) Select Disk 0 (3) clean. After that start over again in Windows PE and OS deployment will be functional then.

One last solution is using Johan Arwidmark's Final Configuration script. This script will clean out any Leftover MININT or Sysprep folders. Enable WindowsUpdate, Set a default domain value (read from the JOINDOMAIN environment variable), and then do a proper final reboot. It can be found here: http://www.deployvista.com/Blog/tabid/70/EntryID/61/language/en-US/Default.aspx

Note: You need to set SkipFinalSummary=YES in customsettings.ini (the script will check for it)

Thanks to Anton van Pelt, Twitter: @antonaustirol25 for sharing his knowledge on this!